Gunderson
Double Stack Construction - Part 4
Click on pictures for larger
view
The last few parts of the construction were the brake system, walkways and painting. This is how that deal played out - pretty typical of how things go in getting things done.
The basic problem in building the brake system was information. I have about 40 pictures of the 40’ double stack car. However, I could have used about 140 for this job. I made a couple of trips in search of another car to look at but would probably have had better luck finding hen’s teeth.
Finally, I put together what information I had and started in on the job. The big brake levers were not too hard to make. You can see from the auto cad drawing and the 3-D view what that part looked like. Just did the 3-D for practice. The trick is in aliening the parts and connecting them. That is much easier in the welding shop.
 |
 |
 |
The next job was the brake wheel housing and the levers and pulleys. This is where I could sure have used some blue prints. The housing was made from .070 steel cut out on the band saw. The parts were welded together and then put on the milling machine to true up the bottom. The brake wheel and housing were castings. I had gotten mine from Mercer when he was in business. Since I could no long purchase these items from Mercer, the parts were duplicated in my foundry.
The “B” end hand brake is activated by a rod that lies on top of the right side of the car. This rod is connected by chains and pulleys to the truck brake lever. The “A” end is connected by a large clevis and lever to the brake housing. There seems to be various ways that Gunderson did this job. So, if you see a car and it has all chains and pulleys or the brake wheel is on one end and the valve and air tank is on the other, it’s just because Gunderson couldn’t make up their mind where to put the stuff.
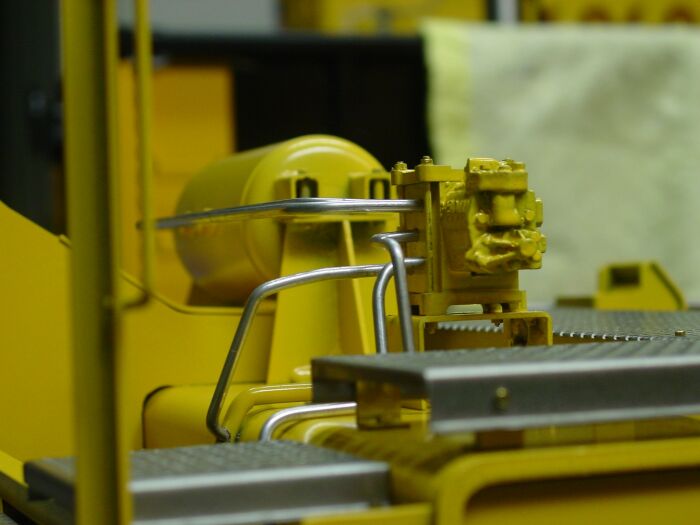 |
The air tank was turned on the lathe from a piece of aluminum. The tank brackets were machined from aluminum and bolted to the tank with 5-40 socket head cap screws. The bolts holding the tank to the brackets were 2-56 with the bolts running though small pieces of copper tube. Not sure why they protect the bolts but, I guess it is the Railroad way. |
Air valve is a little tricky to make. Start with a piece of aluminum and cut away everything that doesn’t look like an air valve.. Only kidding.. but almost true. I am not sure if this is the correct valve but again no good photos were available. The only pictures I could find in my files were about 15 years old. But, I guess the valves haven’t changed much.
The walkways were a challenge. How do you drill about 1,500 holes. I tried to get a company in Chicago to do it on a CNC but the cost was out of sight. Laser cutting was even more expensive - more than the total cost to build the car. So, it was up to me. I built a fixture from 5/16 plate steel, basically a little table that could be held in a milling machine vise. I stacked up 6 or 7 sheets of 22 gauge steel and clamped them down using 1/8” x ¾” wide steel bars running the length on both sides. The approximate size if the table area was 8” wide by 18” long. I also drilled a ¼” hole in the ends and installed a ¼” dowel pin. This way sheets could be removed at the proper time with out losing the registry on the machine.
|
|
|

Then came the painting. Ace Hardware makes the only color of yellow that I could find to match the U.P. Armor Yellow. It comes in a large spray can, or at least it did. In the past couple of years there seems to be a problem with their paint drying - like it takes about a week to dry. I complained to the store manager. You can guess how much that helped. I was willing to try more of the non-drying paint but they no longer carry that color, Sunset Yellow. This little gal looks up a number in this big book and tells me that now that color is Caterpillar Yellow. I purchase a can and take it home for a test. No way. The next step is the professional paint store. I bring a sample of what I have been using and they send me away with a CASE of school bus yellow. Convince me that I have an exact match. WRONG. Next weekend I go to St Louis. After hitting a few “Ace is the place” stores and come up with 2 more cans of sunset yellow.
Finally after 6 coats, light ones, and 3 days to dry, the paint job came out real good. I was holding my breath. Next came the decals. I had Connie Miracle make them. She has done an excellent job. I had a few things that needed to be corrected. Never take all of your information off a G scale car. Those G scale guys will put anything on a car to make a fancy paint job.
 |
 |
 |
Click here for the Gunderson Double Stack Gallery
Well that is about it for this job. It took about 6 months. Roughly 540 hours of labor and about $350.00 in material not counting the trucks and couplers. It was quite more involved than I had anticipated many more details than most cars. But, I am quiet satisfied with the finished product. Would I build a bunch more? I don’t think so. Life has to go on…