|
Old-time
Four Bay Hopper Project
click on images for larger view
I dubbed
this car "the car that refuses to be built". This car is a 70-ton
quadruple hopper built by the standard steel car corporation in the late
20's. The car had a capacity of 140,000 pounds at 2,739 cubic foot level
with the top. The length was 42'-6" over the striker faces. All my
information came from the Train Shed Cyclopedia No.48. The book has line
drawings of the top, side and end views plus several cross-sectional views.
There are also a couple of black and white photos.
This car had several features
that caught my eye and made it look like an interesting project. I have
already built 8 of the Gill Rittenberg hoppers and basically just copied
what he had done. I did redesign the center beam for more strength by
using thicker material and welding it rather than riviting it together.
I wanted to take his car a
step further with a design that I had not seen in the inch and a half
world. Starting from scratch and using my new skills at AutoCAD seem to
be a better way to go than the old method of full-scale drawings on my
board. Eventually that proved not to be the case.
The problem seemed to be that
the drawing was easy to make but after the material was cut and bent there
was nothing to compare it to to see if looked like it would fit. It is
hard to tell with sheet metal if the angles are correct or just look correct.
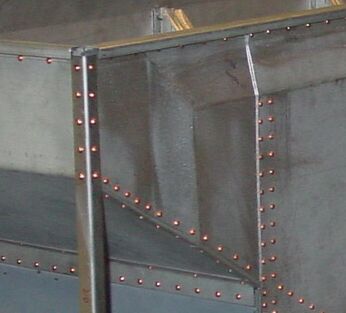
The material I used caused some problems also. I used what is called 18-gauge
paint lock steel that is .045 thick. The advantage is that it has a zinc
coating that holds paint, doesn't rust and is very clean to work with.
You can tell from the gray of the metal in the photos.
The disadvantage is that it
can't be mig welded very well. These particular bunches of steel sheets
were very tough. It was almost like working with stainless. It was difficult
to form into a sharp radius and couldn't be unbent once bent. Basically
there was no fudge factor.
I think in years past the same material must have came from a different
supplier. This material in 20-gauge would have been great. Also, just
plain cold rolled or hot rolled steel would work very well.
Getting to the car and its
characteristics. The car has stepped sides rather than slanted sides at
the end. This made for an unusual 5-point bend to offset the sheet .400
of an inch. Normally one would assume that the sheet would have to be
cut and welded to make this shape. Being the great metalworker that I
am. (joke), I was able to figure out a way to stretch the metal into the
needed shape in one piece. That figured out, I thought I was well on my
way to building the rest of the car with no problem. Wrong.
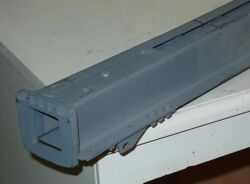
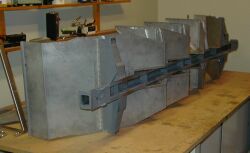
Next came the special sidepieces
at the ends that stick out like stretcher-bearers. They have an odd shape
and also have the .400 offsets to match the upper side. For that I made
3 dies. Two to form the left and right versions and one to form an offset
for the lower side angle that goes the length of the bottom of the car.
Next I built a rather large
plywood table to mount into the milling machine vise to hold the side
sheets. I used the CNC machine to drill all the holes. The mill was only
able to drill half of the sheet at a time making it necessary to flip
the part. With careful alignment, the two hole patterns lined up very
good.
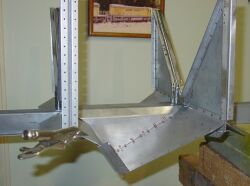
After most of the interior
sub assemblies were made and assembly was started, I discovered things
were not going right. The problem with AutoCAD is that it is difficult
to work with untrue length lines or to say lines that do not lie flat
on paper. Dealing with two or three of these lines meeting on a computer
screen in the same place is just plain tough. Of course, you can print
these computer drawing out full size but I don't happen to have a 36"
plotter with a 100' roll of paper on it in my den…
I guess the jist of this discussion
is - with this project I learned that computers are great but sometimes
one still has to rely on old fashion pencil technology.
More dies were made and more
are coming to finish this project. Hopefully at the end of nine months
of labor my shop will give birth to a new car. Check back from time to
time to see what the little bast^%* looks like. LOL.
Continue
to Hopper Car Construction Part 2 -->
|


